• Skip to main content
  • What We Do
  • Our Work
  • About
  • Contact

Mackey

Lab Notes

March 27, 2017 by Mackey

First Comes Writing, Then Comes Design: How a Content First Approach Will Lead to a Better Website

When clients come to us to build a website, they often come with some type of design ideas. From the specific design features they want to a list of websites they like and don’t like, most people seeking to build a website have spent time thinking about what the site should look like. But, more times than not, very little time has been spent on what the site is actually going to say. For most, content isn’t fun. Hence it’s often pushed to the bottom of the list, focusing instead on the latest snazzy design trends to make their site seem, for lack of a better word, “cool.”

We get it. Content is not cool. It’s not always fun. And it requires time. But, content should not be an afterthought. In fact, we believe content should be the first thought when it comes to designing or redesigning a website. Pushing content to the beginning of a website project leads to an educated design that effectively delivers your message.

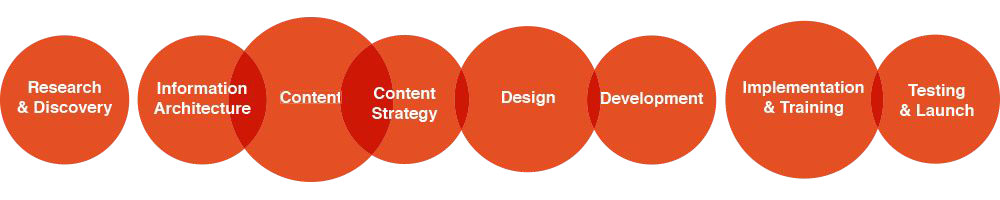
Why the Content First Approach?

Many get excited to see their new website, so they just want the design to get under way as soon as possible. But, if we don’t know what the website is going to say, it’s very hard to know what it should look like.  But starting the process with design results in a generic template that will force you to stuff content into meaningless places just so that it fits into the design that was made. By taking this approach, your website may look good, but often your message will be limited by the confines of the design.

“Content precedes design. Design in the absence of content is not design, it’s decoration.” – Jeffrey Zeldman

But, isn’t the purpose of a website to deliver your message? To share your story with your users? A cool looking site is fun for users to look at, but once they’ve seen it the honeymoon is over and now it’s about content.  Valuable content, on the other hand, is why users are there and why they’re going to keep coming back.  Taking the time upfront to plan and craft your site’s content, allows for content to be taken into consideration during the design process. We can then design a website that complements your content, showcases your core message, and effectively leads users to your main calls to action and your goals.

If You Build it They Will Come? Probably Not.

Having a website does not mean having visitors. There’s a lot that goes into driving traffic to your site, but at the core is content. Current and modern design trends, while important, are not going to keep users on their own. Users aren’t coming to your site to look at your homepage, they are coming to get something done. In an ever-changing design and technological world, it’s even more important to focus on Users’ Needs.

Our content first approach is based on the Core Model by Are Halland. It starts with identifying who your users are and what the core tasks are that they need to accomplish on your site. We then look at how those tasks overlap with the goals of the website owners. After identifying our users, their objectives and the website owners objectives, we begin to map out the content in a way that serves both. Spending this time planning and researching lays the groundwork for both meaningful content creation and effective design.

Content First Doesn’t Mean Final Content First

Content takes time and usually many, many iterations. Developing content before beginning design doesn’t mean the content has to be perfect. The goal is to get as close to a “proto-content” before beginning the design. Sure more content revisions will be completed before the finished site goes live, but that’s ok. A solid content draft will still work to effectively inform the design process.

When planning content, we focus on the cores — when the user’s tasks meet the business objectives. The same approach should be used when actually developing the content. This core content is your priority. It is what’s going to satisfy users’ needs as well as help you accomplish your goals for the website. Thus, it’s the core content that is the most essential to have when starting design.

Content development can be a very overwhelming task.  Being tasked to complete content before design, probably makes you feel like it’s going to be forever before you have a website. Breaking up the process into chunks helps alleviate that nagging “this is never going to happen” feeling. Set aside the non-essential content — that can come later. Spend your time focusing on the core content and making sure that is solid. And when it is, design can begin.


Whether you have a lot or a little content to develop, the approach stays the same.  Check out our 5 tips for writing or rewriting content on a website to help create a smoother content writing process.

Filed Under: Content, Journal

March 5, 2017 by Mackey

Do I need Google AMP (Accelerated Mobile Pages)? And how do I implement AMP for WordPress

As you already know, Google influences runs our lives. As web designers, web developers, content editors, online managers, system admins — basically anyone working on the web — we are often at the whim of decisions made at Google. Some good, some bad, and some perplexing.  As users, we put a lot of faith trust in Google and often don’t even realize the scale of that trust. We can get into the good, the bad and ugly of Google, but we’ll save that for another post.

Often it’s difficult to determine what we need to implement, what we need to pay attention to and what will probably die out and become obsolete without warning (ie goodbye Google Site Search and Google +). In this round, we’re going to explore Google AMP (Accelerated Mobile Pages).

Let’s dive in.

What is AMP (Accelerated Mobile Pages)?

AMP (Accelerated Mobile Pages) is an attempt by Google to make news and blog stories load faster on mobile devices — essentially making articles and news items appear to load instantly. It removes all the “fluff” of web pages and zeros in on the content.

AMP standardizes the way content is loaded on a mobile browser — “content is King and user experience is Queen.”

You have probably already seen AMP web pages if you’ve ever searched on Google in your mobile device, they look something like the below — essentially a card style of latest news stories around a topic with an image. When clicked, they open instantaneously and allow you to still swipe left and right through the other related stories/ articles.

[one_half][/one_half]

[one_half_last][/one_half_last]

Do I need Google AMP?

If you run a news website or a blog that posts regularly (like daily or potentially weekly), then yes you should look into implementing AMP. If not, then it’s not necessary. But nonetheless, the message is clear — load time is critical on mobile devices and if nothing else this should get you thinking about how you can load your content faster and more streamlined — again that mobile first approach.

Why do I need Google AMP?

It’s not going anywhere anytime soon. Haphazardly introduced in early 2016, AMP has matured and it’s been fully embraced by Google. If you try to implement everything Google does, often you’ll find yourself running around with your head cut off, but it’s now obvious that AMP is sticking around and as online content creators we need to pay attention.

From the standpoint of the user: it makes content load faster and in a well-organized and standardized format.

From the standpoint of the publisher, they get their content featured on Google (well sort of) and it loads faster, and faster page loads mean more people actually read your content.

Setting Up Google AMP

We won’t go into all the details, but the crux of it is that you build a secondary page that is a stripped down version of the main web page. For instance, if you have a web page that is an article titled “How to dig a hole to China” on your blog, you would create a secondary page that is just for Google AMP — same title and content, but no design, no header, no footer, no fancy menus, no form to lead, no popups, etc. — stripped to the essential content. Think web pages pre 2000. But Google does give you some pretty cool options and components for setting up your Google AMP pages — carousels, video, Facebook cards, etc.

The Google AMP Project has a variety of documentation that walks through implementation:

  • Getting Started
  • Components
  • AMP HTML Specification
  • And AMP Analytics!

Yes! There’s Google AMP For WordPress

Yep there’s a plugin, actually two. Right now the best option is AMP for WP (WordPress) but it also requires Automattic’s (founders of WordPress) AMP plugin. Setup and install is pretty straightforward.

  1. Install the AMP for WP plugin and activate
  2. When prompted, install the AMP plugin from Automattic (yes we know that’s not spelled correctly)
  3. From there, go to AMP > Getting Started in your Dashboard and start working through the settings, see https://ampforwp.com/help/ for more information on setup.

Again, this is not necessary if you don’t run a site that generates a lot of timely content, but if you do, then this plugin will make your life much easier.


AMP (Accelerated Mobile Pages), from our vantage point, is an attempt to change the way we build websites and how we deliver content. It makes us focus on the content and take a mobile first approach. This is good. But, it also controls our content and what we want to display to the user — goodbye open web.

AMP is definitely not for everyone and actually, the majority of sites don’t need to implement it at all at this point. But, the message here is clear: make your web pages more lightweight and make sure they load fast on mobile devices. You’ve got less than 3 seconds, don’t let your “fluff” get in the way.

Watch and keep tabs on AMP, but don’t lose any sleep over it.

Filed Under: Content, Development, Thoughts, Wordpress

February 20, 2017 by Mackey

Make Your Photos Instagram Worthy with the Foodie App


Instagram makes me hungry. It’s like opening the app cues my stomach to start growling,  even if I’m not hungry. That’s because the food photos on there look so dang good. And, there’s no shortage of them — restaurants showing off their menu items, chefs highlighting their creations, and diners showing off the incredible meal they are about to indulge in. As I scroll through the amazing shots of food and drink, it gets me wondering two things. 1, How can I eat that food, right this minute? And 2, how the heck do they get that perfect shot?

We currently manage the Instagram account for one of our clients, a local Pasadena restaurant. Preparing photos to post for them has made the second question even more relevant (though personally, I am still very intrigued by where I can get the food). I’m not a food photographer and the client doesn’t have the budget to hire one (which would have been the optimal solution). So, the question became how can we use the resources we have (i.e. an iPhone) to capture shots of their menu items that will be able to compete with other food pics on Instagram? The photos we were taking never looked as good as the food did in person. And, it was tough finding filters that enhanced the food rather than making it look worse. After some research and lots of trial and error, I found an app that has forever changed the way we capture food — the “Foodie” app.

Foodie is a dedicated camera app for taking pictures of food. Launched by LINE Corporation, Foodie is a free app for both iPhones and Androids. You can take photos directly in the app (which I recommend) or upload a previously taken photo and use the app to make it Instagram worthy. Either way, our food photos are looking much better and are making us hungrier than ever.

We have spent a lot of time trying out the Instagram filters as well as other photo apps, but Foodie really became the most streamlined process with the best result. Here’s how:

1. It has over 30 filters specific for food.

Not only are the filters made for food, they are actually made for specific types of food. There are filters for Ice Cream, BBQ, beverages, and more. Each filter is optimized for food photography helping you to photograph any food you want.


2. It helps you get the best angle.

Often times a “top shot” is the best way to capture food, but I never seemed to get right on top. But, when using the Foodie app camera, it changes colors to let you know when the camera is positioned flat, directly above the food on the table, helping you get the perfect angle for flat lay photography.


3. Adjust brightness for darker shots

First off, natural light is MUCH better for food photos, so hopefully, this feature isn’t needed as much. Also, adjusting for brightness is a pretty common feature in photo apps (Instagram included). But, the one in  “Foodie” often serves as the perfect final tweak to your photo.


4. Easy Sharing

Similar to most photo apps, Foodie lets you easily share your finished photo to Social Media, text messages, emails, your camera roll, etc., making for a seamless edit and post process.


All in all, you could spend hours editing and tweaking to get the perfect food photo for your Instagram. And in the end, nothing will compare to an awesome camera with a skilled photographer behind it. But, if you don’t have that at your disposal, then the Foodie app is a great way to make sure your pictures make the food look appetizing, intriguing, and social media worthy.

Foodie is available for download on the Itunes store and through Google Play.

Filed Under: Digital Marketing, Journal

February 11, 2017 by Mackey

3 Simple ways to track events, goals and campaigns in Google Analytics

If you have a website or any online presence, you’ve most likely heard of Google Analytics. You may have even dabbled with overall traffic, page views, demographics, sources, etc. This information is all great and very useful, but more often than not, we’re looking for a way to determine if our campaigns, marketing, and website are working.

Google Analytics is complex, very complex. There is a lot of information you can get from Google Analytics and there’s also a lot of information missing from Google Analytics that you would love to have. But, unless you’re going to purchase an enterprise solution or even a few enterprise solutions, Google Analytics is the best we’ve got and if used consistently, over time we can use trends and its data to make better decisions on our sites.

Besides the basic tracking mechanisms, how do you track specific actions, events, and campaigns in Google Analytics? We’ve compiled 3 ways to better track goals (conversions), events, and campaigns. These three methods can be used in conjunction to better understand if your marketing efforts are indeed working.

Let’s dive in!

1. Tracking Traffic Source Using Campaign URL Builder

This is useful if you are wanting to track clicks through to the site from a particular source. Case in point, you run an ad on Pandora, it’s a beautiful banner ad. You want to track this ad for:

  • How many people are coming to the site from the ad?
  • The number of leads that came from Pandora that lead to conversions/ goals.

Using Campaign URL Builder from Google, you can create a custom URL that includes a query string that is tracked by Google Analytics as a source. You can then connect this source to your goals/ conversions (and events in fact), see numbers 2 and 3 below.

Building the URL’s is pretty simple:

  1. Go to https://ga-dev-tools.appspot.com/campaign-url-builder/
  2. Enter Website URL you are wanting to link to, ie https://mydomain.com/get-started/
  3. Campaign Source, enter the source, ie Pandora
  4. Campaign Medium, enter the medium, ie Banner (both this and the Source will display when looking up the data in Google Analytics)
  5. Don’t worry about the other fields unless you’re so inclined
  6. Next, under “Share the generated campaign URL” copy the URL to use for your campaign or click “Convert to Short Link” and copy the Shortened URL
  7. When you use this in your campaign, any clicks to the site from the campaign will be tracked as a Source / Medium with Google Analytics

View Traffic From a Particular Source

  1. Log into Google Analytics
  2. Click on left side under Acquisition > Campaigns
  3. Once you click into the Campaigns or a specific Campaign, you can add a secondary dimension to further understand the user’s interaction with the site. For instance the “Page” or “Landing Page.” Additionally here you can view columns for you goals/ conversions and how many goals/ conversions were completed via the Campaign.

2. Tracking Clicks and Events

Within Google Analytics we can track specific events. An event is an action the user takes with a site. For instance, how often the “Get Started” button on a website is clicked. This could really be any number of actions, i.e. when a user opens/ closes a toggle — essentially any click on the site.

The code looks something like: ga(‘send’, ‘event’, ‘Get Started CTA – Desktop’, ‘Click’, window.location.pathname); and is placed on the anchor tag for instance:

<a href="/get-started/" onclick="ga('send', 'event', 'Get Started CTA - Desktop', 'Click', window.location.pathname);" role="button">Get Started <span class="fa fa-caret-right"></span></a>

In the basic setup:

ga('send', 'event', [eventCategory], [eventAction], [eventLabel], [eventValue]);
  • Event Category = The object that was interacted with, ie a video or button (be specific)
  • Event Action = The type of interaction
  • Event Label = Categorization of events (currently we use this as window.location.pathname which gives the URL of where the event took place
  • Event Value = A numeric value associated with the event (we don’t use this in simple implementations)

GA Events Generator by Raven Tools has a great tool for generating specific event tags and information on more complex implementation of tracking events: https://raventools.com/marketing-reports/google-analytics/event-tracking/

Viewing Events in Google Analytics

  1. Log into Google Analytics
  2. On the left side find Behavior, then click on “Events” then on “Top Events” — we’ve found this is the best entry point for view by Category.

Similar to Campaigns, you can align events with conversions and goals. We use this often to track conversion funnels, form submissions, call to action, etc.


3. Conversions and Goals

With Google Analytics you can set up Goals/ Conversions. This is the end of the funnel. This could be a thank you page after a form submission, a checkout page, or whatever the end of the funnel is for your website. Goals work best when you set them up in conjunction with Event Tracking and/ or Campaign Tracking because you can see whether your marketing efforts are working or not working.

You set up the goals based on:

  • Destination = the last page in a funnel, ie a thankyou.html page after a user submits a contact form.
  • Duration = time on site
  • Pages/ Screens per session = number of pages visited
  • Event = Specific event conditions

Set Up Goals

  1. Log into Google Analytics
  2. Click on the property
  3. Go to the Admin tab
  4. Click on Goals
  5. From there you can add or edit goals.

View Goals in Google Analytics

  1. Log into Google Analytics
  2. Make sure you’re on the Reporting tab
  3. On the bottom left of the page click on Conversions, then click on Goals, then Overview

The above are three of the simplest methods we’ve found to better understand what’s working or not working in our campaigns and marketing efforts, but of course, there is much much much more you can do with Google Analytics. If you have other techniques that you use or questions about anything we’ve discussed above, let us know in the comments or shoot us an email, info@mackeycreativelab.com.

Happy tracking!

Filed Under: Digital Marketing, Journal

February 6, 2017 by Mackey

Do I Need a Facebook Business Page? 5 Ways Your Small Business May Benefit from Being On Facebook

Facebook is here and from the looks of it, it’s not going anywhere anytime soon. Its cultural relevance and social media dominance raise the question of whether or not your business needs a Facebook page. Unfortunately, it’s not a simple yes or no answer.  Without taking your business, target audience, and objectives into consideration, the best answer we can give you is “maybe.”

Now, we know “maybe” is not particularly helpful, and we want to be helpful. If you don’t yet have a Facebook page, you are probably already very familiar with the reasons against having it. For many small businesses, Facebook (and social media in general) seems like too much work.  Maybe you don’t know how to use it, or you think you don’t have time to manage it, or you assume your customers aren’t on Facebook. All valid reasons. But, there are also a lot of reasons why you may want to consider Facebook for your small business. Since these may not be as well known, we thought it would be most helpful to look at these reasons and show you why we think a Facebook business page could be a good idea.

You get a customer, you get a customer, everyone gets a customer!

At the close of 2016, Facebook had 1.86 billion active users. Despite the rapid emergence of social media channels over the past few years, Facebook still reigns as the largest social media audience. And the more active users means the more potential customers for you. Of course, they aren’t all going to become customers, but Facebook’s extensive user base does open up new possibilities to find and interact with past, current and prospective customers.

The more ways to find you, the better.

We have a facebook page. Until recently, we rarely posted much. Currently, we have less than 100 people following us (and I am pretty sure we are related to over half of them). But, even with that minimal activity, if you search “Mackey Creative Lab” on Google, our Facebook page comes up as the 2nd and 3rd results, only beat out by our website. Having a Facebook page (as with other social media accounts) helps build your online presence. It gives potential customers another way to find you and interact with you. Plus, presenting the world with a consistent message across multiple online platforms grows your brand, increases its legitimacy and helps build trust amongst customers.

Nothing good comes for free unless your name is Facebook

Creating a facebook page for your business costs nothing. Sure, there are ways to spend money when using it —  paid Facebook ads, hire someone to create graphics, photos or videos for your posts, and more— but just owning real estate for your business on Facebook is free.

Not only is it free, but there’s a good chance it already exists—even if you didn’t create it. That’s because when someone, anyone, checks into a place that doesn’t have a page, Facebook creates an “unmanaged” page to represent the location. This page shows up on Facebook (and possibly Google) when someone searches for you, displaying anything another user has posted as well as any business location or hours information they are able to automatically pull. So, since the page is free and it may already exist, investing a little time to “claim the page” and update it with correct information that’s consistent with your brand, will only help.

Want more website visitors? Get them from Facebook

The most important thing is to differentiate between why we use personal Facebook pages (sharing photos of our puppies, kids, and food) and why we use business Facebook pages (to not share photos of our puppies, kids, and food). On a business page, Facebook posts can, and should, be used to link back to your website.  Put links to your website anywhere on Facebook that makes sense. The ultimate goal is to get users off of Facebook and onto your website. When done correctly, Facebook will help increase traffic to your website, which will help your overall search rankings.

There’s no such thing as TMI on Facebook

Should you decide to venture into some paid advertising through Facebook, you will be welcomed with the most sophisticated set of audience demographics available on the internet. Facebook advertising lets you sift through 1.6 billion users’ location, language, device, interests, behavior, gender, age, and education options to find the potential clients you want to target. The ability to target such specific demographics helps generate more qualified leads, making sure that the money and effort you cough up to post to Facebook is “well spent.” 


For a small business, Facebook presents a cost-effective and simple marketing tool to try and build your audience. Ultimately, how much it benefits your business will depend on the efforts put forth in building your Facebook presence and how that incorporates into a larger digital marketing strategy. But, even if those efforts are small and you don’t have a larger digital marketing strategy, Facebook could still help some, and probably won’t hurt. Still not sure if you need a Facebook page? Or, are you convinced, but need help setting it up? Let us know. We can talk with you about Facebook as it relates to you and your business as well as help you to get it going.

[button url=”https://mackeycreativelab.com/get-started/” color=”black” size=”small” type=”square” icon=”” target=”_self”] Contact Us [/button]

Filed Under: Content, Digital Marketing

January 20, 2017 by Mackey

Rock solid stock photo libraries that won’t break the bank.

It’s said that photos are worth a thousand words and it’s not far from the truth. Photos help create emotion, they convey context and often portray the message we can only try to put into words. But taking custom photos is not usually practical nor within budget — thus the necessity for great stock photos.

Stock photos, videos, and images are key to successful projects, whether that be a flyer, a website or a blog post. Stock photos cut down on costs and time, two major things that help move projects forward.  We’ve compiled our list of the best stock photo libraries that we use regularly.

[toggle title=”See what’s in this post…” state=””]

  • Stocksy (premium)
  • ShutterStock (premium)
  • iStockPhoto (premium)
  • Flickr (free)
  • Unsplash (free)
  • Life of Pix (free)
  • StockSnap.io
  • Death To Stock

[/toggle]


Premium Stock Photo Libraries

These libraries offer stock images, photos, and videos with full licenses — perfect for commercial use.

Stocksy

Stocksy is by far our number one go to website for stock photos. Their stock images have an authenticity that many other sites lack. We’ve been impressed with their images and found images that are more lifelike and journalistic in nature than most other sites. Their library is comprehensive, but not nearly as expansive as the larger players, ie Shutterstock and iStock. We always start our search at Stocksy.

Stocksy has a film archive as well as you can find videos intertwined (see https://www.stocksy.com/#video as a start).

Their pricing is simple and straightforward, small, medium, large, extra large — no packages, but the pricing is reasonable, see pricing.

[button url=”https://www.stocksy.com/” color=”black” size=”medium” type=”square” icon=”” target=”_blank”] Visit Stocksy [/button]


Shutterstock

Shutterstock

Shutterstock and iStock are very similar (a lot of times the same images), but we tend to lean towards Shutterstock. Why? Well that’s hard to answer, but their pricing structure of $49 per month for 5 images downloads works well for us — we often use them after we’ve exhausted our options with Free Libraries (below) and Stocksy.

Additionally, we use Shutterstock for video as well as vector graphics to help get a project going or fill in gaps. It’s also a good source to search a topic and get ideas centered around particular keywords or a concept.

You’ll find a lot of your typical “this is definitely a stock image” type images as well as plenty of giant street signs with all types of business buzz words, but if you weed through those, you’ll find some great stuff.

[button url=”https://www.shutterstock.com/” color=”black” size=”medium” type=”square” icon=”” target=”_blank”] Go to Shutterstock [/button]


iStock by Getty Images

iStock

Honestly, we rarely use iStock. It’s very similar to Shutterstock and our preference just happens to be ShutterStock, but that’s not to say there is not value at iStock. You can find photos, graphics, vectors, videos and more there and it’s a great place to get ideas. They offer pricing plans similar to Shutterstock.

[button url=”https://istockphoto.7eer.net/c/353581/258824/4205″ color=”black” size=”medium” type=”square” icon=”” target=”_blank”] Visit iStock [/button]


Free Stock Photo Libraries

For free stock photo libraries be sure to review their license terms prior to commercial use.

Flickr Creative Commons

Flickr Commons

The best part is it is free, you can find some great stuff here, but be sure to add attribution.  Though it’s not the best source for commercial use (https://www.flickr.com/creativecommons/),  we’ve definitely used it before for various projects, articles, and as dummy images. It’s great for editorial and finding images that are authentic and credible – after all, they are, for the most part, “real” images, not staged.

You can narrow down your results by:

  • Attribution License
  • Attribution-NoDerivs License
  • Attribution-NonCommercial-NoDerivs License
  • Attribution-NonCommercial License
  • Atribution-ShareAlike License
  • Public Domain Dedication
  • Public Domain

[button url=”https://www.flickr.com/creativecommons/” color=”black” size=”medium” type=”square” icon=”” target=”_blank”] View Flickr Creative Commons [/button]


Unsplash

Unsplash

Unsplash is amazing. It’s worth a look even if you don’t need a single photo. The images are beautifully composed — it literally speaks for itself.

Unsplash is contributed to by a number of photographers. This is definitely not 6 foot back, 6 foot up (if you know what I mean). All images are completely free and even if you don’t use them for a single project, they make amazing wall art (and are large enough to print).

[button url=”https://unsplash.com/” color=”black” size=”medium” type=”square” icon=”” target=”_blank”] View Unsplash [/button]


Life of Pix

Life of Pix

Similar to Unsplash, Life of Pix has new photography added weekly and the images are high quality and completely free. This is a great source for lifestyle photos as well as more artistic shots. If we don’t find anything in Unsplash, often times we’ll turn here next.

[button url=”https://www.lifeofpix.com/” color=”black” size=”medium” type=”square” icon=”” target=”_blank”] Go to Life of Pix [/button]


StockSnap.io

StockSnap.io

Now I’m a bit of a purest, well sort of, and I’m not a huge fan of online companies aggregating content and displaying it as their own, but that is exactly what StockSnap.io does (at least from what I have experienced). They have a lot of images pulled from throughout the web including other free libraries in this list, so don’t be astonished if you see the same images here as on Unsplash. But, it is a nice point of reference to start your search for free images.

[button url=”https://stocksnap.io/” color=”black” size=”medium” type=”square” icon=”” target=”_blank”] Search StockSnap.io [/button]


Filed Under: Design, Journal, Photo

  • « Go to Previous Page
  • Go to page 1
  • Go to page 2
  • Go to page 3
  • Go to page 4
  • Go to page 5
  • Interim pages omitted …
  • Go to page 11
  • Go to Next Page »
Mackey
Web Design and Development, Branding, Graphic Design and Marketing Strategy
680 East Colorado Blvd., Suite 180 & Second Floor, Pasadena, CA 91101
info@mackeycreativelab.com // 626 214 5093
© 2014-2021 Mackey, LLC, All Rights Reserved